Feed on
Posts
Comments

I’ve been trying to focus my attention and energy on the new shop. Since it’s so easy to be distracted by shiny stuff, I’ve been avoiding the auctions and on-line sales. This past week, I got wind of sale that had some very interesting machines. To make maters worse, this is less than five miles from the new shop. This was the IRS sale of excess equipment from Heritage Cabinets in Shirley, MA.

The first lot (and most interesting) was this Whitney No. 177 Variety Saw

177-1 177-2 177-3 177-4

It has the original fence and miter gauge. On the downside, it was missing the throat plate and was a 550 volt motor.

Next up was the Brookman Dovetailer

brookman1 brookman2

This is a 15 pin machine. Looks like it’s all there. These are pretty hard to come by in the States.

Then there was the Whitney Double Spindle Shaper:

ws-1 ws-2ws-3

This is an older model. Likely a No. 143 or similar. Nice small footprint. Included the frequency changer and 14 shaper heads. I’ve actually been looking for one of these for a while now.

Finally, there was this Mattison Stroke Sander. Looks like both pillars and the center table are present:

mattison-ss1          mattison-ss3 mattison-ss2


Every one of these machines sold for short money:

Whitney No. 177 -$375

Brookman Dovetailer -$326

Whitney Shaper -$376

Mattison Stroke Sander -$525

Just to give you some context on how good of a deal these were, The dovetailer would easily bring $1200 (and is near impossible to find), The shaper heads were worth far more than the $376 selling price for the entire package (you could probably get a few hundred bucks in scrap for the frequency converter alone). The Mattison center table alone typically sells in the $1500 range. Unfortunately, it’s worth far more as furniture than as a working machine. Finally, the Whitney No. 177, was well below any bottom feeder pricing. Add a hundred bucks for a transformer and you’ve got yourself the best variety saw ever made.

The sad, sad punch line is that I didn’t buy any of them. Until I get the new shop under roof, I’ll be doing my best to avoid eye contact with any new machines. More to come on progress on the shop shortly.


Tags: , , , , , , , ,


Well, it’s been a while and I guess an explanation is in order…… About 18 months ago, I started working at a new job in the area of Boston Massachusetts. I was doing a Sunday commute from Jersey to Boston and then heading back to Jersey Thursday evening.  That’s 306 miles (each way) of the worst traffic in the Northeast. It’s a new job in a completely different industry. After spending the past 20 or so years working in Reinsurance and financial services, I have a lot to learn about the Life Sciences industry. This translates into long days and zero time for extra-curricular activities. After about a year, the commute, being away from home and living in a hotel was wearing thin on me. I decided it was time to start exploring a move back to New England.

I started looking for a house with a reasonable sized piece of land. It needed to be within commuting distance and in a decent school district. For those of you that have not experienced the Boston commute, this is a tall order. The route 3 commute is horrible on a normal day. If something goes wrong you’re seriously screwed. I spent the past 20 years working in the metro NY area.  If you left reasonably early, you could breeze right into the city. Contrast that with Boston, where route 3 can be a parking lot at 5 AM.  The ride out of the city isn’t any better. By 3 PM the road is a backed up and moving at a snail’s pace.  After many months of searching I settled on a few towns. My preferred town was Groton, followed by Dunstable. They share the same school district and are within 20 miles of my office. Now the other big issue is finding a lot that is big enough to build a house and a reasonably sized barn. Most of the available lots don’t have enough contiguous dry land to allow for this. I probably looked at 20-30 lots and was unable to come up with anything. I was in constant search mode, driving around and checking MLS daily. Finally, in July I came across a listing for an existing home on a five acre lot in Groton. I went to look at it on my own as my family was on vacation in Japan at the time. I was surprised by the house and the lot. The house is a reproduction Victorian, about 25 years old. The lot is relatively flat and amazingly does not have any wetlands. There are some quirky things about the house, but nothing I couldn’t live with (or deal with later).
town-forest-640


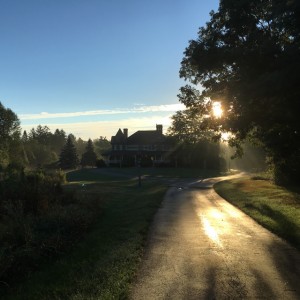
When my family returned to the states, we went back to see the property again. Amazingly, everyone liked the place and we made an offer, which was countered and then accepted. There was some drama following the inspection (new roof, new boiler and some other repairs needed). I made a revised offer that was significantly lowered and was surprised that it was accepted. We asked for a fast closing and were able to complete the deal in the middle of august.

The move had to happen quickly as school started just a few weeks later. Everything went reasonably well and we were all moved in by the first week in September.

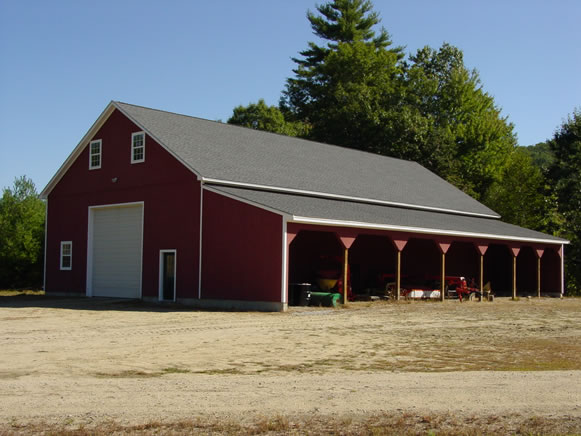
It took me a few weeks to deal with the aftermath of the move, but once that was mostly cleared I started looking for a good spot to situate the new barn. I had originally planned to do a pole barn, but after thinking about insulation and the like, I decided to go with traditional framing. The building is 36′ x 60′ and has a 12′ x 60′ run in shed on one side for tractors and forklifts. The picture below is a similar structure:

gs1

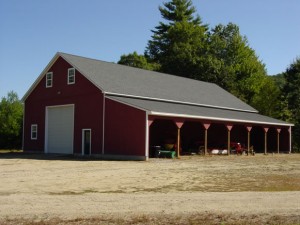
My design has a steeper roof pitch and is a mirror image. The building has a 12′ door on both ends, which will allow me to drive right through with the truck and trailer. The floor and footings are substantial enough to support a bridge crane. The roof is a steep pitch and has extra loading for a PV array on the south side. The building is a clear span inside, with 14′ ceilings. This is a bit more convenient than my current setup.

Once I had the location picked out, I went to the township to inquire about the building permit. I was pleasantly surprised at how easy it was to pull a permit for the foundation. I stripped all of the topsoil off using my trusty JD 790 and a box blade with rippers. It was about a foot deep, so I ended up with a mountain of it piled off to one side.

Next I headed off to the local rental store to get a small excavator to dig the trench for the footings.  They had the machine I wanted and I was all set to go until they asked me for my Massachusetts Hoisting License. This was a surprise to me. I worked in the Bay State with heavy machinery in the past and never ran into this. I can only assume it to be a new tax.  The good news is that you can take an on-line course followed by a test and get a temporary permit issued. The not so good news is that it’s only good for 14 days and you cannot apply for another permit within 45 days. Once you complete the course and pay your twenty bucks, you are presented with a very official looking certificate that states that you are authorized to operate an excavator.

It took me about 4 hours to dig the 192′ feet of 4′ trench required for the footing and the frost wall. We had the footing forms setup two days later and poured a few days after that. Once the footings were inspected, we setup the frost wall forms. This took another day, with concrete being poured the following day.

footing-640

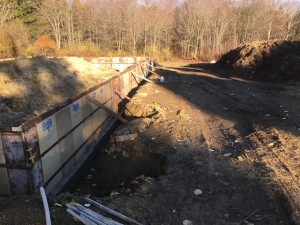
Once the walls were poured and inspected, I moved on to backfilling and leveling the interior for the slab. I had sand trucked in for the fill directly around the walls. The remainder was backfilled with soil that I removed during excavation. Fortunately, I thought ahead and piled most of the dirt removed for the trench inside the walls. This meant moving a lot less dirt around.

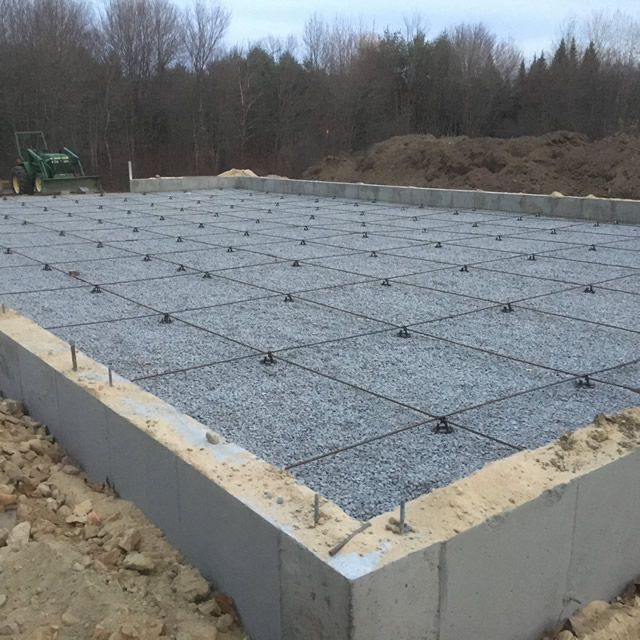
Once the area was flattened for the slab, I compacted it thoroughly and topped it off with a layer of sand followed by 4″ of 3/4″ crushed stone. This was followed by a rebar grid and finally wire mesh.

stone-rebar-640

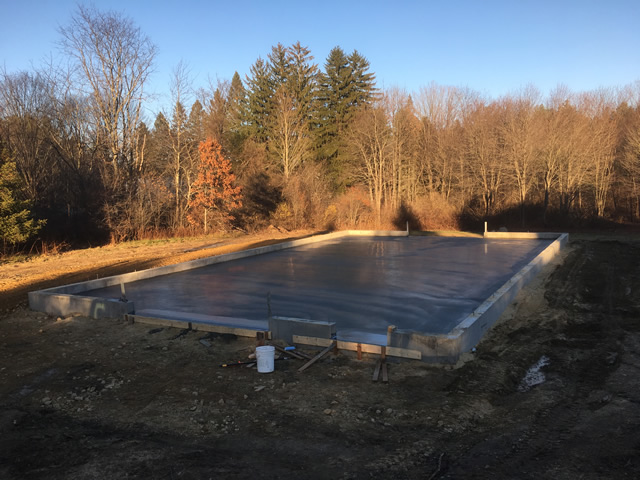
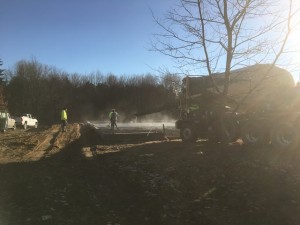
The next day I had everything cleaned up and ready for concrete. This is a 6″ thick slab with some additional thickening in areas for added support. That amounts to just over 40 yards of concrete. Given the application and time of year, I opted to use 4000 psi mix with 2% non-chloride accelerator. It was pretty chilly the morning of the pour as is apparent from this photo of the concrete being placed:

concrete-pour-640

The crew spent the next several hours finishing the concrete. At the end of the day I had a pretty good looking slab:

finished-slab-640

I got out early the next morning and cut the relief joints. It took more time to go get the saw then it did to make the six cuts. With the foundation in place I feel pretty good about being able to get the building completed regardless of the weather.

The electric cable was delivered last week and I’m preparing to dig the trench this weekend. Moving on to getting the framing lumber and trusses ordered for next week.

I’ll try to keep this updated as things progress.

Thanks for watching.
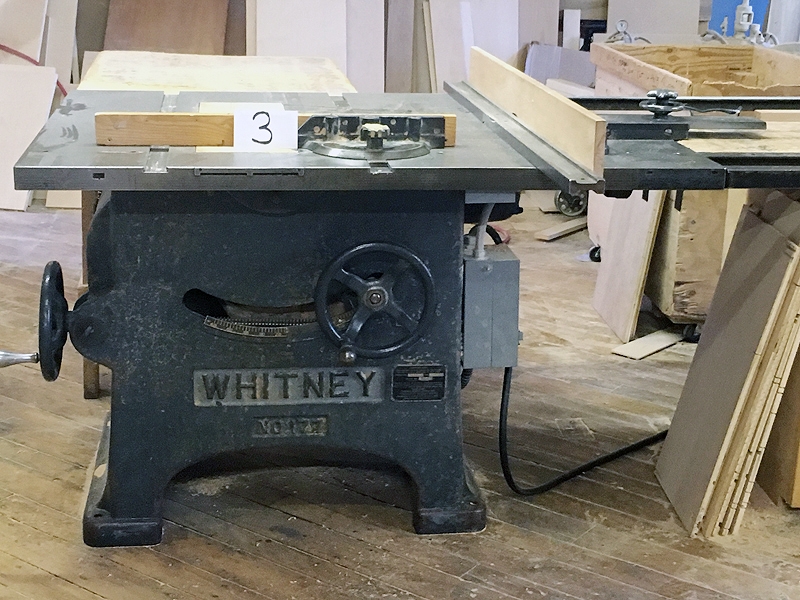
Tags: , , , , , ,

Over the past week or so, several of you have reached out asking, speculating, wondering what it’s like to operate the Sagar Spindle Moulder with the box joint attachment. I always try to give the people what they want, so here goes:

I moved the machine from the garage over to the shop this past Sunday. I had to rig it up with some temporary power since the machine is setup to run at 400 volts and 50 cycles. I have a special transformer setup that I keep on an old railroad cart. The transformer is setup to go from 240 volts to 400 volts, but can be adjusted anywhere from 380 to 480 volts. The older 50 cycle motors can sometimes be sensitive, so it can take some fussing about to get it right. In this case, I was lucky on the first try and she fired right up.

The first thing I noticed was that during wind-up, there is a certain point where a vibration resonates through the machine. It’s not too severe, but that sheet metal guard shakes pretty good. This was a bit concerning the first few times I started the machine. The same vibration is manifested at the same point on wind-down.

The second thing I noted was that the guarding was not sufficient. In the starting position, the cutter block is well guarded, but when you move the workpiece through the cutting position, the entire block is exposed. Even worse is the trajectory of chips as the last piece runs through the block. While standing in the operators position, you get pelted with sawdust and chips. You definitely need safety glasses, if not a full face shield.

This guy would look like he stuck his head into a chip blower:
Sagar-corner-lock-attachment

This would be very easy to remedy with a sheet of lexan mounted to the edge of the rolling table. You’ll get a better understanding of this point when you watch the video.

I only used 10″ board for my test cut. I didn’t have anything 16″ laying around. Even if I did, I probably wouldn’t have used it for a test. My test boards are clear vertical grain western red cedar. They cut very nice, but have a tendency to chip more than white pine or hardwood. For this reason, I used a sacrificial board before and after my workpieces.

The workholding vise on the rolling table is setup with the bottom surface exactly in line with the bottom of the first cutter. There is a removable rebate plate screwed to the vise. You can cut all of your sides with the plate in and then remove it and cut all of your ends. This feature makes for very easy setup. The fence on the machine is set so you can but the workpieces against it for perfect length of the joints.

I had to mess around with the machine a bit to get the cutters perfectly aligned with the vise. Once I did, I could easily and reliably repeat the process. With this setup you could make 10’s of boxes an hour.

Enough of me blathering on… Here’s the video:

Here are some better shots of the joints. The last picture is the joint I cut after I tweaked the settings a bit. Much improved:

Joint cut on the Sagar Spindle Moulder using the Box Joint attachment

Joint cut on the Sagar Spindle Moulder using the Box Joint attachment

Joint cut on the Sagar Spindle Moulder using the Box Joint attachment

Joint cut on the Sagar Spindle Moulder using the Box Joint attachment

Joint cut on the Sagar Spindle Moulder using the Box Joint  attachment

Joint cut on the Sagar Spindle Moulder using the Box Joint attachment

In summary;

Is it scary? Hell yes!
Daunting? Absolutely!
Terrifying? Sure. Maybe. (the first few times you turn it on).
Dangerous? As currently setup… Yeah… it needs some work here.

Hey, it’s no Morgan, but it is absolutely fit for purpose. I will definitely be looking for some lexan and maybe an air actuator to move the work through the cutter block.

Thanks for following along.

Tags: , , , , , , , , ,

Lately, I’ve been buying shapers like it’s nobody’s business (meaning I have no business owning this many shapers)  A few weeks ago, I received this little gem from the United Kingdom:

Sagar-9

It’s a very sweet little Sagar shaper with a Wadkin rolling table attachment and a very large set of box joint cutters on it.

Then last week, I was lucky enough to get a call from my friend Jesse alerting me to a Whitney No. 89 that was up for auction in Philadelphia. I already own three No. 89 shapers and the bid price was so high that I passed on it. However, in the catalog was another English gem:

295043b

295043c

295043d

295043h

295043i

A pristine Wadkin EQ. The shaper had all of it’s original switch gear, a 1″ spindle and a brand new Delta single phase three roll stock feeder.

32” x 36” table
220/440V, 3 phase
1” spindle
6,000 & 9,000 RPM spindle speeds
Forward & reverse
Delta 3-Roll variable speed feeder
1 HP, 230V, single phase
S/N EQ430

The current bid was low ($225). I bookmarked it. Jesse was going to the preview, so I asked him to check the machine out. The bad news… the upper spindle bearing was making a whole lot of noise. The good news (and I mean very good news) was that the much sought after fence was on the fl0or behind the machine. This is a beautifully made, heavy cast iron fence. It’s nearly impossible to find one on this side of the Atlantic. The ending auction price was $650. It cost me an additional twenty bucks to get it loaded.

Here’s a picture of it at home with the fence mounted:

Wadkin EQ Fence

Wadkin EQ Fence


Finally, I was doing my usual digging around on e-bay early yesterday morning and I ran across an auction for a Yates N-4 shaper. It had a fence on it and was located in nearby Brooklyn, NY. It was scheduled to end later that morning, so I bookmarked it and set a reminder to check back on it. When I finally did check back, it was only at $102. I decided to place a bid on it and checked back later that afternoon. Much to my surprise and delight, I had won it for a whopping $122.50

N4-eb

n4-2

$_57

n4-5

n4-3

n4-4

Now part of the reason for the low price was the issues with removal, which were pretty clearly spelled out in the auction listing and the Q&A submissions and responses. I’m familiar with the location and have both delivered and picked up machinery there. The only way out is on a pallet jack, using a freight elevator. When you get to the first floor, there’s no street level access, just a couple of loading docks. This is pretty daunting to most folks, but I’ve got some ideas on how to get the machine into the bed of my truck. I’ll post a follow-up after I pick the shaper up.

N4QA

N4LD


So, that’s three new shapers in two weeks. Add this to the eight I already have and you might start to think I have a problem.

Thanks for playing along.


Tags: , , , , , , , ,


On a recent trip to England, this little spindle moulder caught my eye:

Sagar-8

I had been looking for a cheap shaper I could steal the fence from. I have a few European machines that are missing the split style fences that mount into the dovetailed slots on the table. As an example, this Pierre Benite shaper is just about perfect, but lacks a fence:

Pierre Benite Shaper


I decided to take a closer look at the machine and realized that it had a number of features that could be quite useful.

First, it has this add-on sliding table:
Sagar-7

It only has about a 24″ stroke, but still very useful with this heavy vise/clamp:


Then it has an overarm bearing support for a long spindle:

Sagar-13


It has a bunch of spare parts ( spare spindle, cutters, etc)

Sagar-18Sagar-11

I might have bought it just to get the handy little Spanner bracket:

Sagar-17

This shaper is belt driven. The design is more like the Wadkin EP or the old Onsrud  where there are v belt pulleys at the lower end of the spindle and the spindle moves through the lower bearing block:

Sagar-14

Sagar-16

The original contactors and switchgear have been replaced with a modern mag starter and placed on the outside of the machine. The original cover plate is still there for the push buttons, but the innards have been removed.

Sagar-15


It’s also equipped with a hand brake and spindle lock:


Sagar-5


Getting a single machine moved from The North of England to Somerset New Jersey is a somewhat costly proposition. It’d have to be a pretty nice machine to warrant the expense and trouble. This is especially true considering the abundance of very good American made shapers  that are available these days.  It would have to be a pretty special machine. Right?

Well, it does have one feature that puts it over the top:

Sagar-9

That would be 16 inches of box joint (corner lock) cutters. Here’s a closer shot of the stack:

Sagar-12

I have not disassembled this spindle yet, but these are all carbide tipped with spacers between them. I’ve seen a few shapers with a small stack of dado cutters setup for this operation, but never anything like this. Between the spindle setup  and the rolling table, this machine is every bit as fit for this purpose as a Morgan box cutter. Since all of those machines now reside in a low, dark, non-descript warehouse in south central Pennsylvania or an old airplane hanger in central Vermont, this is the next best option. For my purposes, this is better since I have a shaper a tenoner and a box joint cutter in one machine. It was a whole lot less expensive too. Given the propensity of some folks to spend six thousand dollars (or more) on a single box joint machine, this was a bargain at 180 quid.


Addendum 05/04/14: I was browsing my Wadkin tool catalogue (1952) this morning and realized that the fence, rolling table and cutters are all an add-on from Wadkin. It’s designated as the “Corner Locking Attachment Type E.F.” What’s interesting is that the kit on my shaper is nearly three times as high as the spec shown in the catalogue. Most likely a piece of custom work.

Wadkin EF CornerLock


Tags: , , , , , , , , , ,

The machine in question is my Yates American Y-30 Snowflake Bandsaw.
8429-A

I had been using this saw as you see it on the trailer for a number of years. It only needed a set of guides and I had it running as my primary resaw. I ended up buying a big Wadkin PBR earlier this year and decided I should go through this saw to clean it up both in appearance and function.
Now to be clear, the saw was running fine. I decided to take the upper wheel off the saw so I could get the guards off and have them powder coated. Now I’ve rebuilt a number of Yates American bandsaws. They always use two taper roller bearings on the upper shaft. These are pretty much arranged the same as the wheel bearings on a car. I was surprised to find out that this particular saw used an entirely different arrangement. The upper shaft had two double cone tapered roller bearings. In essence this is four bearings on the upper shaft. Here are some exploded views of the bearing assembly:
Bearingassy-1
Bearingassy-2

There was about 5 LBS of grease in the housing between the bearings. Once I got it all cleaned up and washed the bearings out, I realized that the bearings were pretty badly worn. It’s easy to see looking at this race:
354A

No big deal, I’ll just order up some new bearings. I called my favorite bearing house (Bearing Depot in Middlesex NJ). I told them I had a Timken 359D that I needed to replace. Long pause…

Are you sure on that number?
Yes…
I cant find anything. Can you double check the number and get back to me?
Sure.

I went out to the shop and took some pictures of the bearing and e-mailed the bearing house. They called me back the next day saying that this bearing wasn’t available.
Ok. I’ve been pretty lucky finding new old stock bearings. I checked my usual sources and located two sets at a supply house in Kansas City. I booked the order on-line and waited. A day or two later I got an e-mail from the supply house stating that they didn’t really have the bearings (it was a problem with the inventory database not being updated).
Ok. keep searching.
After an exhaustive search, I was able to locate the bearings in two locations. The first was Amazon.com. They had them for $411 each. These were minus the 354A races, but those were readily available from a number of sources for $16.00 each. That’s $886 + shipping. The second source was Nanjing Bori Bearing Co. in Nanjing China. They had the complete setup with the races for $76.00 each + shipping. Shipping was $86.00 (express), and there were some fees associated with using PayPal. All in, it was $279. I was able to speak on the phone with the sales manager (Emily (surely not her real name)). She confirmed the bearings were in stock and could be shipped right away. Now I will admit that I was somewhat hesitant to buy three hundred dollars worth of bearings from an unknown source in a country where I would have little or no recourse to the law, but I eventually talked myself into it. I went ahead and placed the order. Three days later I got a call from UPS asking me what was in the package. I told them and they confirmed that the shipment would clear customs that evening and be delivered the next day.

Now I fully expected to receive a set of bearings made in China that met the same spec as the Timken bearings. Imagine my surprise when I opened the package and found this:
359TD

This was a very pleasant surprise. Two completely match sets of Timken bearings, races and spacers for a third of the best price I could find here. The service was exceptional and given the language, distance and time zone barriers, Emily went above and beyond in making this deal work. It looks like I’ve got another good source for hard to find bearings. I’ll probably try running some of my precision bearing needs through this source. The ABEC 7 seven bearings are pretty expensive from my traditional sources. Maybe I can save some money on these as well.

So… back to the question: “When is it OK to buy bearings in China for a classic American Old Woodworking Machine?”
When you can get the same bearings at a third of the price you’d pay here in North American.

One thing I want to be very clear on.. I don’t equate “Made in China” with inferior quality. I think you can get very high quality goods from China. You can also get cheap crap. The same is true of US manufactured goods. The real problem is that we (all of us) really like our cheap crap.

Tags: , , , , ,

Whitney Fence Part 2

So this is what I’ve been able to accomplish so far:

Flattened base and two sides using a large shell mill:

Drill the mounting holes and define layout for the fence support bar bores:

Drill the first holes using a 1/2″ x 8″ bit:

Open the holes to a larger size with stepped drills:

Open the top hole with a roughing mill to allow the use of a larger end-mill tool holder:

Bore the bottom hole using a 1-1/2″ rough end mill:

Use the adjustable boring bar to open the hole to finished dimensions:

Repeat the same steps for the other side:

Use the adjustable boring bar to finish both sides to the final dimensions:

Ok, so what you can’t see here is that the table is locked in the Y axis. This ensures proper alignment (height) of the fence bars.

The next step is to clean up the surface finishes and then start with the lathe work on the fence bars.

Here’s a link to a video version of the description.


Tags: , , , , , , ,

This one has been on my backlog for quite a while now. I was going through some of my old e-mails and came across this item. Anyway, here it is:

Back in 2011, as I was compulsively rummaging around on craigslist looking for another Whitney saw to add to the collection, I came across this ad for a weathervane:


ANTIQUE 1880’S HORSE WEATHERVANE – $3500 (INDIAN WELLS)


Date: 2011-10-17, 9:50AM PDT
Reply to: sale-usutb-2654271745@craigslist.org [Errors when replying to ads?]


THIS HORSE WEATHERVANE WAS ONE OF A MATCHED PAIR THAT CAME OFF AN OLD BARN OWNED BY BAXTER D. WHITNEY CO. IN WINCHENDON, MASS. THIS BARN WAS AN OLD MACHINERY COMPANY AND WAS USED FOR PATTERNS STORAGE. THE BARN WAS ESTIMATED TO BE OVER 100 YEARS OLD. THIS EXCEPTIONAL WEATHERVANE WAS PURCHASED FROM THE KENNEBUNKPORT MARITIME MUSEUM IN KENNEBUNKPORT, MASS. IN 1988.

THIS REGAL HORSE CAN BE DISPLAYED INDOORS OR OUTDOORS. WHEREVER THIS HORSE IS IT ALWAYS ATTRACTS ATTENTION. A MAGNIFICENT PIECE OF FOLK ART. IT MEASURES APPROX. 40 INCHES LONG AND 43 INCHES HIGH

SERIOUS BUYERS ONLY PLEASE. CALL (xxx)- xxx-xxxx

  • Location: INDIAN WELLS
  • it’s NOT ok to contact this poster with services or other commercial interests

Although I was not exactly a serious buyer, I went ahead and contacted the seller. A few days later I got an e-mail from the buyer with a bunch of photos:

The seller supplied a phone number so I called and asked how they knew this piece originated from the Whitney complex in Winchendon. They explained that the weathervane was acquired from the Kennebunkport Maritime Museum in 1988. They were even able to produce a copy of the letter from the KMM giving some level of provenance for the weathervane:

Of particular interest to me was the statement that the weathervane came off a barn used to store patterns. This is interesting since I knew that the bulk of the patterns from Whitney ended up being moved from Winchendon to Greensboro, North Carolina in the 1950’s after Newman acquired Whitney. The patterns were stored in the attic of the Newman engineering building until it was demolished in 2012. At that time they were moved to an undisclosed location in SW PA (along with untold amounts of documentation, literature and photos dating back to the early days of Whitney’s operation in Winchendon).

I poured over all of the historical photos I could find of the Whitney operation in Winchendon. I couldn’t find any with a barn or similar building with the weathervane. In fact, the only photo I could find of a barn with a horse weather vane was the one below:

I ended up not pursuing this item, but would still like to find some historical evidence that it was once on a Whitney building in Winchendon.  I’d appreciate hearing from anyone that possesses or has access to historical photos from Winchendon.


Thanks for looking.

-the owwm

Tags: , , ,

So… Let’s say you’re driving down the street and you see a hulking hunk of iron machinery sitting on the curb with a cardboard sign with the word “free” scrawled on it with a broad tip marker; Or, maybe an elderly relative passes away and you’re the person responsible for cleaning up the mess they made after 50 years of hoarding junk (I pity the poor soul that get’s that job on my rat hole); Or maybe you are going to an auction and are interested in bidding on a piece of old machinery and just don’t know how high you should go; Maybe you see a piece on e-bay or craigslist or kijiji or some other site and you just don’t know if it’s a deal or if it’s fool’s gold…  How do you find out what the real value of this junk?  You could go to a whole bunch of auctions and build your own index of prices, but that would take years… You could check prices on e-bay, but it’s gotten to be very difficult to tell what something actually sold for versus the typically unrealistic asking prices. You could ask a machinery dealer to help you value the piece, but they have an interest in preserving their business model (buy as low as possible and sell as high as possible), so any opinion there will likely be colored by their goal of making money.

What other choices do you have? You could go to an on-line community of collectors and restorers and ask them to collectively help you with valuation. Unfortunately, they’d be unwilling to offer you any help at all. And any do-gooders, helpful sorts, etc that you might find there are prevented from helping you by the rules:

Appraisals: Do not ask for or give appraisals.  Without seeing a machine in person, there are too many unknowns. In addition, prices vary considerably by location, condition, age, ease of pick up or delivery, and so on.  Your best option is to search for available sale prices, such as completed sales on eBay (as opposed to listing prices with no bids), listings on our own “Bring Out Your Dead” forum, and other sale sites.

I’m not sure why this rule exists. They give a bunch of reasons that don’t make any sense to the newcomer or casual visitor. More of a RTFM response than anything else.  They also have a real aversion to any sort of controversy. If there was a difference of opinion it might result in a healthy argument which is definitely discouraged. Anyway, you won’t get any help from this group either.

I field a handful of requests for appraisal on value and fitness of purpose on a weekly basis. This week the number of requests finally hit the tipping point and I started thinking about what I could do to streamline the process. This page is my first attempt at the improved process. First I need a few lay out the terms of service, disclaimers, etc:

  • I’m not an expert. I see a lot of machines. I go to more auctions than anyone I know. My guess at what something will sell for is usually pretty close.
  • I make mistakes. It has cost me money. If you listen to me, it could cost you money.
  • I’m not a machinery dealer. I’m an IT guy and a machinery opportunist.
  • Valuations are tough to do from pictures and written descriptions. Factors that affect value are often missed in pictures. Old repairs, wear and other factors are difficult for the uninitiated to spot/gauge.
  • Prices do vary widely by region. I’ll try to factor this in. Just remember that if you’re in Seattle and you see a much different price in New Jersey.

I’m going to do this with the comments section of this page. Just post your request in the “Leave a Reply” section at the bottom of the page. I’ll review the request and post my answer in a reply to the comment. I’ve also enabled the ability to upload pictures with your comments. I strongly recommend that you use this feature as it will vastly improve accuracy. At least you’ll be able to scroll through the requests and see if something similar was already submitted.

Eventually, I’ll try to install a discussion plugin which will allow a little more flexibility in the request and response. I may even ask some other folks to act as experts in certain areas. We’ll se how this goes first. If there’s a big enough demand, I’ll work on improvements and expansion.

You can find the new submission page in the tabs at the top of the home page (it’s the fourth tab from the right):


Appraisal tab


You can post your request in the comments section at the bottom of the page. I’ve just installed a plugin that allows images to be attached to the comment. Look for this at the bottom of the page:

Image submission with comment

Image submission with comment


Thanks for looking.

-the owwm

Tags: , , ,

I recently acquired a new shaper (and a quest machine). It’s a Baxter Whitney No. 89. This is the largest of the single spindle Whitney shapers. These machines have huge tables and are bullet proof. I already own one No. 89, but this one is… well… special… What’s really unique about this machine is the overhead bearing support on the spindle. This allows the use of very large heads and very heavy cuts without deflection in the spindle.

Here’s a close-up of the overarm (outboard) bearing assembly. The lock collars on the support bracket allow the bearing to rise and fall with the spindle:

On first observation, the spindle appears to be proprietary. After disassembly, it becomes clear that the shaper uses standard spindles which can easily be changed out for different sizes:

.
.
.
The trouble with this machine and most big American made spindle shapers is the lack of a fence. In most cases, this machine would have been used with rub collars or had a makeshift shop-made fence clamped to the table. I’m a big fan of the European style shaper fences. In particular, I really like the fences on the SCMI heavy duty shapers. I’ve done allright over the years buying SCM basket case machines and stealing the fences from them.
.
.
.
Here are a few pictures of the SCM fence I’m most accustomed to:
On a Invincible T120 Shaper

On an SCMI T100 Shaper

And.. another view of the same fence

.
.
.
.
This got me thinking about what it would take to build such a fence from scratch. The design is pretty simple. A robust cast iron body with a heavy split fence of which the two sides can be adjusted independently. The fences are attached to steel bars or tubes that pass through the body and can be fine adjusted with a handscrew. The bars would need to be of a substantial diameter (2″+) in order to cary the weight of the fences and be robust enough to withstand deflection caused by pressure from a feeder.

As stated above, I really like the SCMI design. However, there are a few things I don’t like. most notably, is the split side where the fence support bars pass through the body. These are split to allow the fence tubes to be locked into position by compression of the opening with a large handscrew. I’ve seen many cases where these were cracked or broken from overtightening or fatigue. This is also a difficult feature to cast and machine.
.

I decided to come up with another approach to this feature.

.

My final design combines the features of the SCMI fence with those of the early Jet fences. Now the only thing left to do was create a pattern. I did this in a two step process. The initial pattern was made from cedar blocks and then sent out to the foundry to be cast in aluminum. I then took the aluminum casting and tweaked it to represent the final design and sent it back to the foundry to be cast in iron.

.
Here are a few pictures of the rough casting:

As mentioned, it’s heavy. Weighing in at just over 50 Lbs.

It’s a hollow core and is internally reinforced to avoid stress, fatigue and failure. Particularly around the bores for the fence support bars:

So this looks like a pretty good start..
Right?
Not so fast.
This is where the title of the article comes in…

It was only after I got the rough castings back that I realized how big a job this would be to machine. The big problem is with the bores for the fence support bars. The body of the fence is almost 8″ deep. Ideally, you want to do the bore directly through in one pass to avoid issues with mis-alignmemt.

As an aside, this reminds me of a conversation I once had with the owner of a US based woodworking machinery manufacturer. I had disassembled one of their big jointers and noted that it had three double-row self-aligning bearings on the motor/cutterhead. I thought that these were mistakenly installed as replacements. The owner corrected me and said they were indeed the original bearings. When I asked why they used these bearings, he explained that they didn’t have the machining capability to run a bore that long in one pass. Rather than retooling (way too costly), it was easier to just let the bearings correct the alignment issues.

Now I know that these bars don’t require the precision of a cutterhead, but I’d like to get it as close as possible. And the engineer in me wants to do the bore in a single pass. My ToolMaster mill only has 4″ of quill travel. This means that the bore will have to be run using the knee movement rather than the quill. That’s a shame since I have a power quill and it’ll be alot of hand-cranking. The next issue is the diameter of the bore. The design calls for 2-1/8″ bars to support the split fence. That’s a big hole to push through in one or even several passes. It’ll need to be done in a stepwise fashion using a combination of drills, end mills and boring tools.

The rest is easy (relatively speaking). The bottom (table side) needs to be flattened. The two sides will need to be squared with the bottom. Finally, the bars will need to be turned on the lathe and the split fence will need to be cut and finished. Then there’s a bunch of small stuff for fasteners, adjustments, etc.

View the video on the concept and rough casting

Stay tuned here for the next installment on this project. I’ve already accomplished a great deal. I just need to get it documented and published.

-the owwm

Tags: , , , , , , , , , ,

Older Posts »